
Design to live faster with Framer
Installing Ghost on shared hosting can be hard. We have to maintain the media storage, database, and even the server by ourselves.
If you have completed installing Ghost on your shared hosting from my previous tutorial. You probably recognized that the database is using SQLite3. It is because we were using the Ghost local install.
Someone asked me, and I've been thinking about moving the database from SQLite3 to MySQL database.
Actually, recently, on my hosting provider, there is one button to install Ghost. This button is installing the Ghost with MySQL configured by default.
I really like this new feature. But, seems like I have to migrate all my content from sqlite3 to MySQL. And I see that this is not easy.
I did a few trials configuring MySQL to the Ghost installation on the shared hosting. Here is how to use MySQL on Ghost installation.
Prepare MySQL Database
Of course, before we add the database configuration to the config.production.json, we have to create a new database and a new database user.
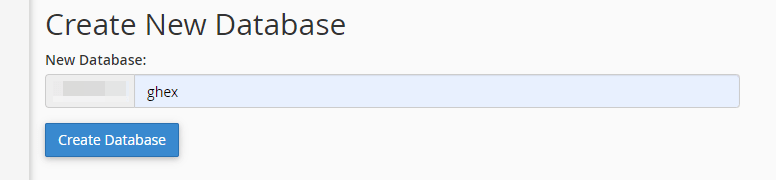
Go to MySQL® Databases from your CPanel page. Fill in the name for the database, then hit "Create Database".
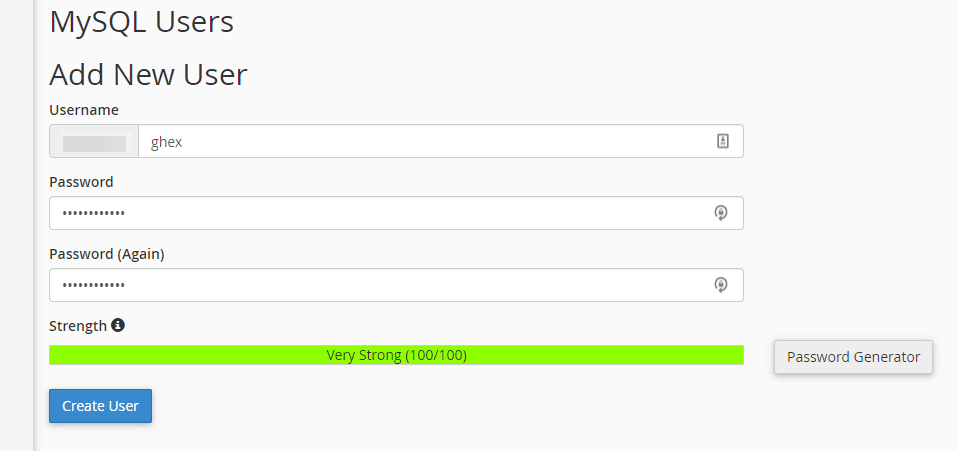
Scroll down to the MySQL Users section. On the Add New User.
Fill in the username for the database's name and the password too. Hit "Create User".
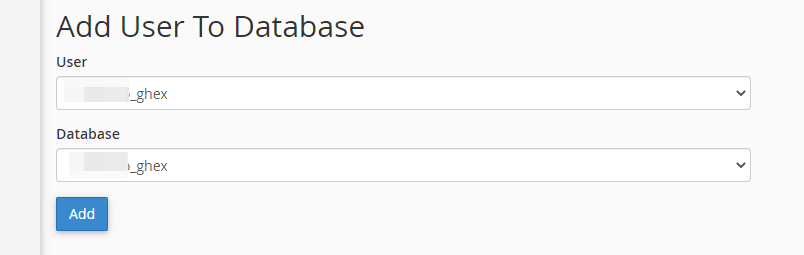
Now let's add a user to the database that we just created in the Add User To Database section.
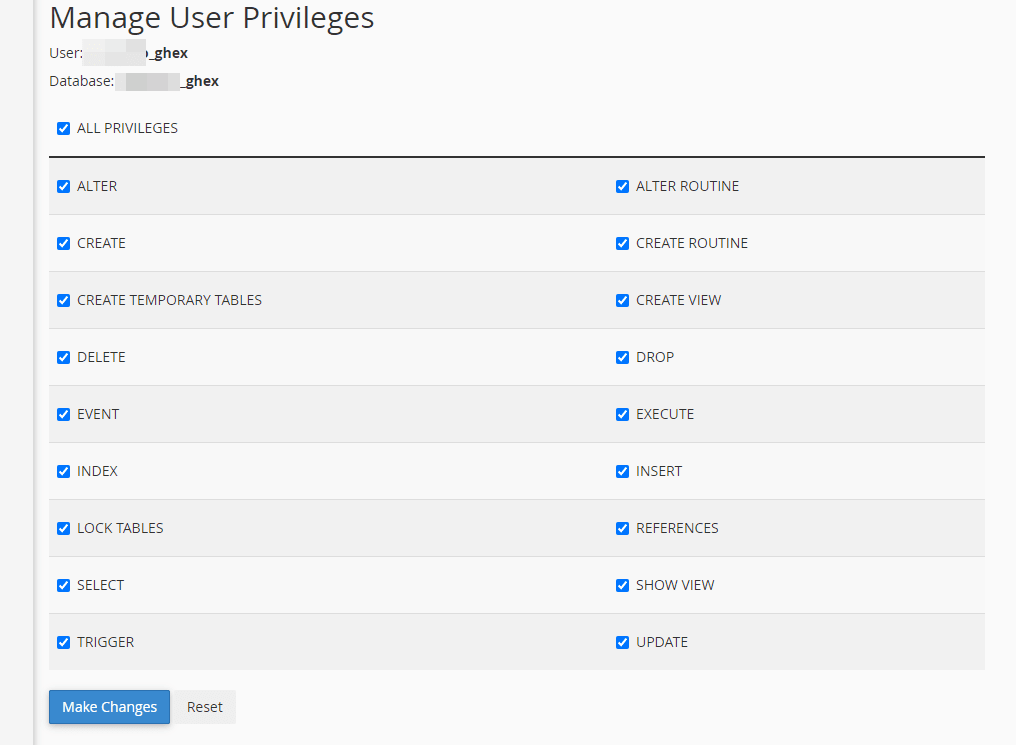
Tick all the user's privileges. Hit "save".
Check if the database username is already connected to the database in the Current Database section in the first section.
Plug In MySQL Database To The Ghost Installation
Go to your Ghost installation folder.
Open the config.production.json. Change your database configuration like the below:
...
"database": {
   "client": "mysql",
   "connection": {
       "user": "your-database-username",
       "password": "your-database-password",
       "database": "your-database-name",
   },
 },
...- We change the client from "sqlite3" to "mysql".
- In the connection. Add your database credentials, the database username, the database password, and the database name.
Hit save.
Stop the Ghost site by using a command ghost stop from the SSH command line. Restart the NodeJS. Then, start the Ghost site by using a command ghost start from the SSH command line.
If you have a problem that says, "field length of 'subscription id' in 'member stripe customer subscriptions' is too long". Try restart the NodeJs and Start the Ghost site again.
Basically, adding MySQL as the Ghost database is easy. You should note that this configuration is better done in the fresh installation of Ghost CMS. Otherwise, you will deal with SQLite3 to MySQL conversion and content issues if you plan on migration.
Hope that helps!
Also read: