Design to live faster with Framer
On a WordPress website we already know that we can add a password to a page or a post.
Only those with the password will be able to view the content.
We may need to customize this password protected page. And it is sometimes challenging to change this page from the default theme.
In this tutorial, we will customize our default WordPress password-protected page. We will use custom code and plugins to match closer to what we like.
This step-by-step guide could be especially useful for WordPress developers.
Either to build WordPress websites for clients or personal websites.
- Overview
- Tutorial Steps
What is WordPress Password Protected page?
A WordPress Password Protected page is a page that requires users to enter password for open the page. If the password is correct, users will have access to content or information. This is usually used to protect content from unauthorized access.
By default, this kind of page will only consist of a paragraph text and password form. It only requires a visitor to enter password to access the protected page.
There's no need to worry about compatibility issues with website builders. Password-Protected page style usually depends on the active WordPress theme.
When Should You Have a WordPress Password Protected Page?
There are many factors you have to consider when deciding. Whether to password-protect your website's pages. As you already know, a WordPress password-protected page requires visitors to enter password. So they can access the information or content on the page.
Many of WordPress owners want to protect their pages to keep the sensitive information. They want to stay safe from spammers or content scrappers.
Use a password to restrict access to your content and control who can access it. We can restrict specific pages, posts, and your entire website.
Or, you might have a membership website. And want to have protected content with a password form, so only subscribers have access.
Why Customize a Password Protected Page?
The style of the Password Protected page will follow our current active theme. With only a paragraph of text and a password input form.
These default content is not a pleasant look for our website. Especially if we want to grant access to clients, members, or even our own team.
We may need more personification to meet our needs. We can make the page more interesting, informative, or give a better experience.
By editing and customizing our Password Protected page, we have the possibility to add:
- A logo on the page, to increase trust and keep branding consistency.
- A custom text to explain how to access the content
- A custom text to inform how to contact through link or email
- A custom text for welcoming message.
- Social media list to get users to follow our social channels.
Instead of a basic page, you can turn locked pages into an ideal place to engage visitors, improve SEO, improve the user experience while enter password on the password form field and generate leads.
How to Enable WordPress Password Protected Page
WordPress gives us the ability to protect the content for both pages and posts. To enable this protected ability, there are two options we can do.
From the edit page or edit post
Adding a password to a particular page or post is as simple as following these steps:
- Go to the edit screen of the page or post you want to password protect.
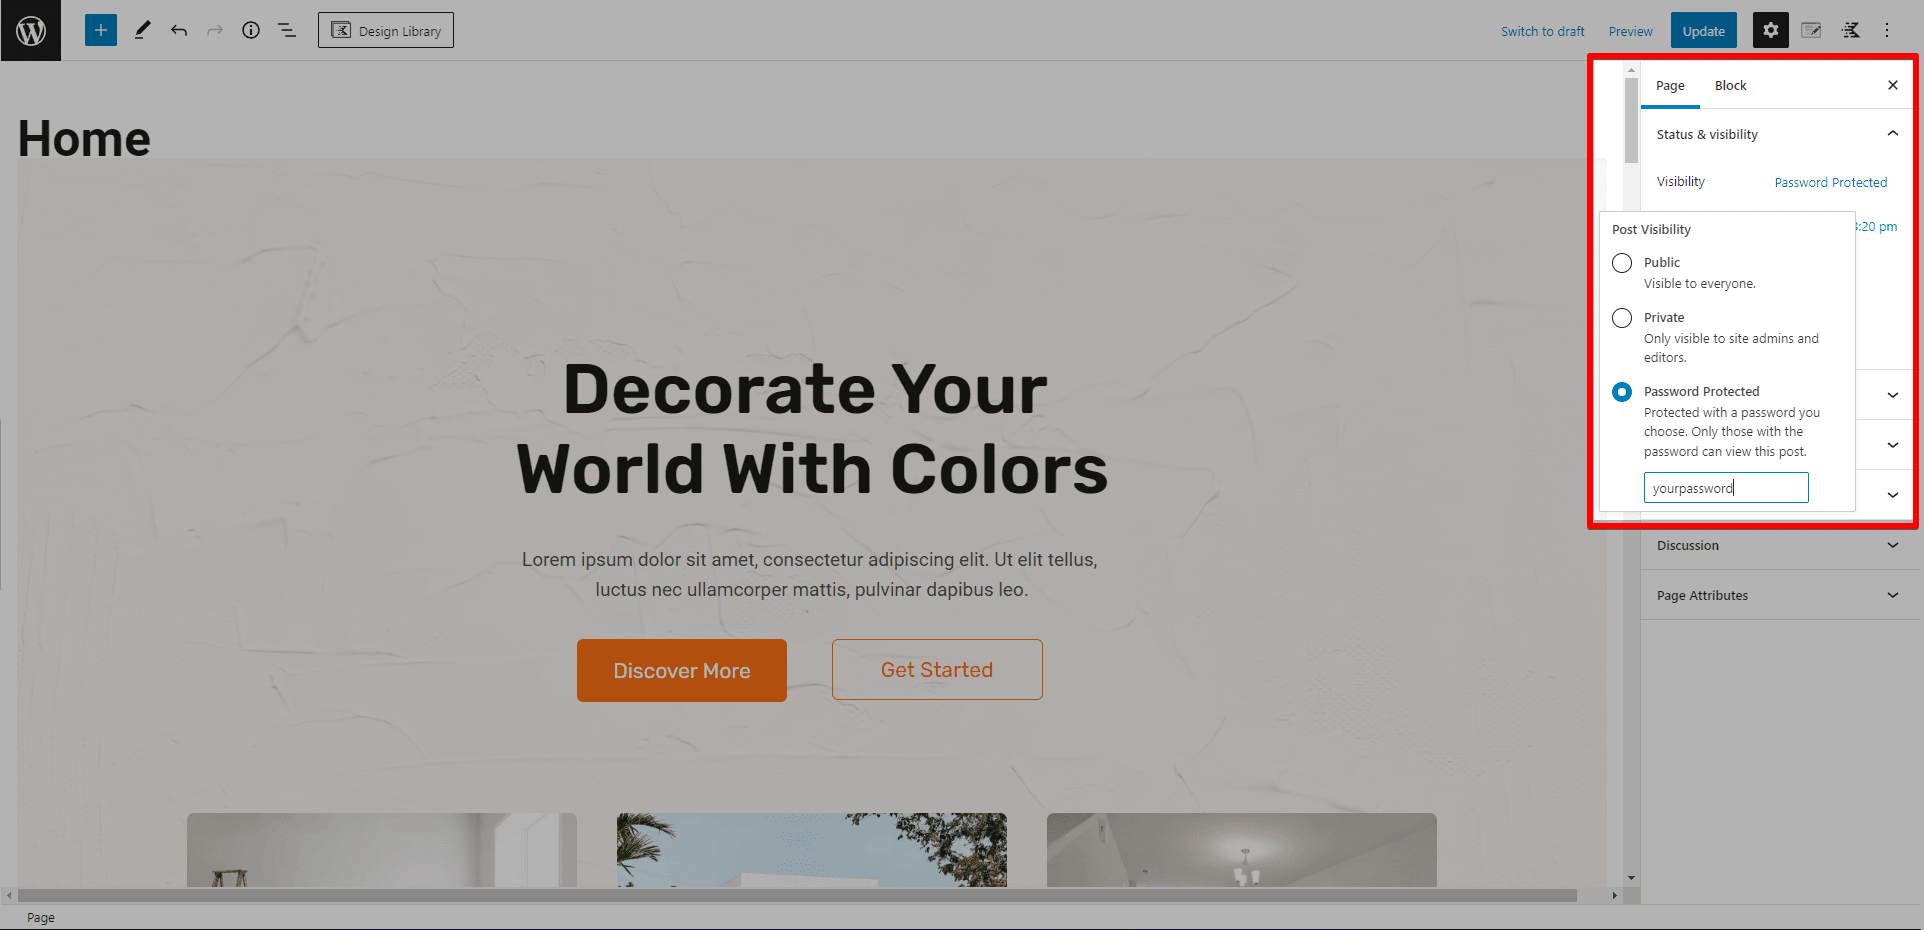
- See "Status & visibility" on the right sidebar.
- Click to see Visibility options. Then select "Password Protected" from the drop down menu.
- Provide the preferred password that users should enter in order to access the content.
- Select "OK" then hit "Publish" to save the change.
Go to the font-end to see that the page has now been password protected.
From the "Quick Edit" menu
The “Quick Edit” option on WordPress allows you to make small changes to your pages. With these tools, you can edit posts and pages with ease.
As the "Quick Edit" panel opens in the same window. You wouldn't have to go back to the page or post listing dashboard to return, since it opens in the same window.
Open the page or post listing in the WordPress admin panel. Hover over the title to reveal more options, then select "Quick edit".
You must fill in the password field with a password of your choice, then select "save".

How to Customize a Password Protected Page in WordPress
There are two options to customize the password-protected page to suit your needs. We can either use custom code or a third-party plugin.
We're only going to use custom code in this article, where we will inject it into function.php.
The Custom Code
Before we dive into the custom code. I'd like to let you know that this step requires a basic of knowledge of PHP, HTML, and CSS code syntax.
Our first step will be to add PHP code to the function.php file inside the active theme directory. This code is to alter the existing HTML element and overwrite it with the new element.
It is possible to edit the function.php file straight from the theme file directory or by using a third-party plugin.
But, the most convenient way is by using a plugin like Code Snippet or WP Code.
While, it's up to you if you prefer to edit it from the theme files.
My favorite is WP Code, which allows us to add custom code to the function.php file, as well as custom CSS and HTML. This plugin also able to add the code to the head, top body, and bottom body of the HTML document.
We will keep the design simple throughout this example. We will also get an overview of how far we can customize using this custom code method.
To overwrite HTML element
After installing the WP Code plugin, hover over the "Code snippet" menu item from the left sidebar. Select "Add snippet" item which will open the list of available snippets you can activate.
For creating a blank snippet, click the link "blank snippet" or "create your own" on the text information above the list.
Add your preferred title for the snippet. On the "Code Type" select field option, choose "PHP snippet".
Paste this example code, replace the content with whatever you prefer.
function my_custom_password_form() {
global $post;
$label = 'pwform-' . ( empty( $post->ID ) ? rand() : $post->ID );
$output = '
<div class="form-wrapper">
<div class="form-innerWrapper">
<form action="' . esc_url( site_url( 'wp-login.php?action=postpass', 'login_post' ) ) . '" class="form-inline post-password-form" method="post">
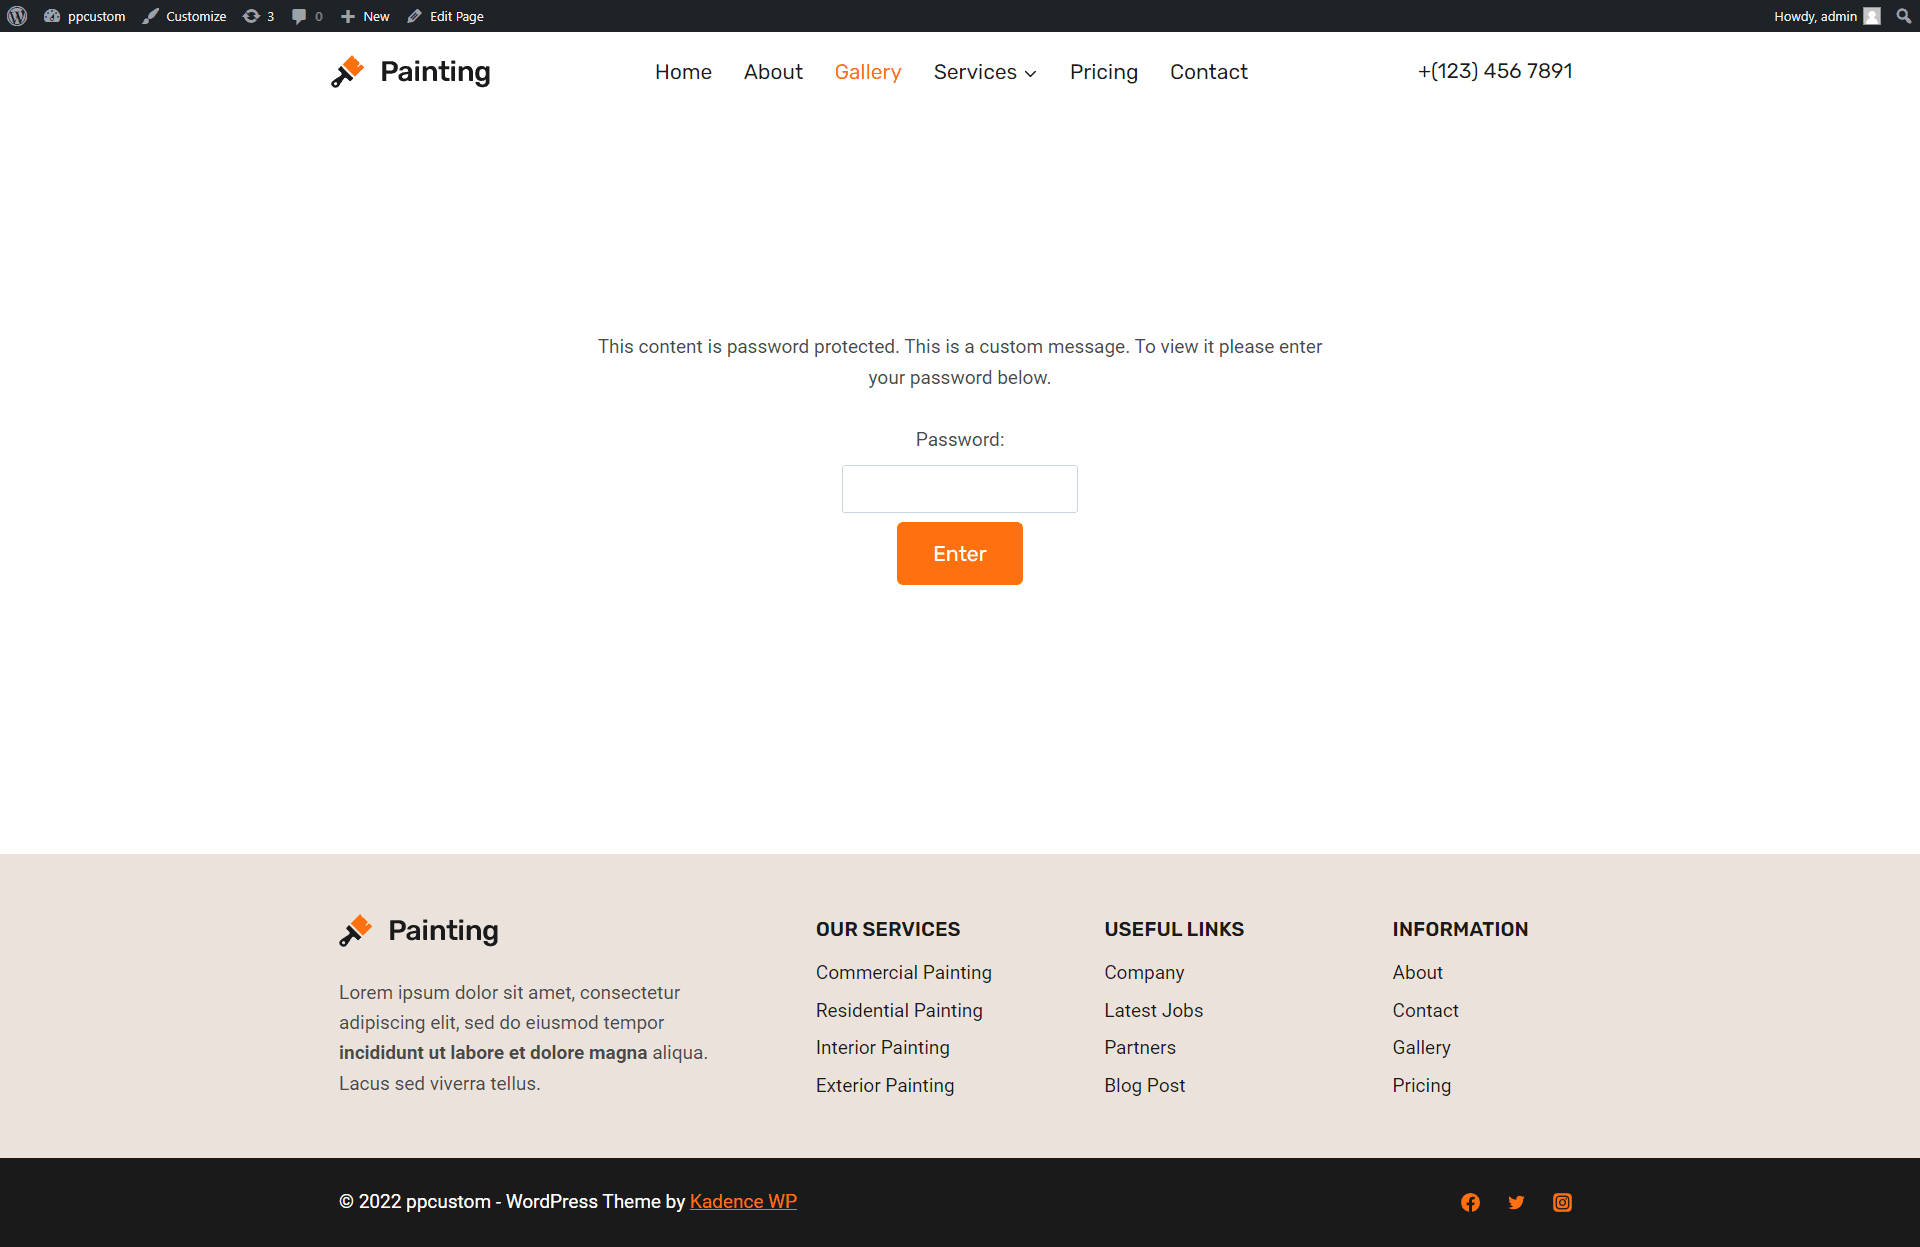
<p>' . __( 'This content is password protected. This is a custom message. To view it please enter your password below.' ) . '</p>
<label for="' . $label . '">' . __( 'Password:' ) . '</label>
<input name="post_password" id="' . $label . '" type="password" size="20" class="form-control" />
<button type="submit" name="Submit" class="button-primary">' . esc_attr_x( 'Enter', 'post password form' ) . '</button>
</form>
</div>
</div>';
return $output;
}
add_filter('the_password_form', 'my_custom_password_form', 99);
Toggle to "Activate" then save the snippet by clicking on the "Save Snippet" button.
Take a look at the front-end and refresh the page. As we can see, the HTML component we added to function.php appears on the page.
Add custom CSS
Adding custom CSS is also possible in several ways. Even though we can also customize the password form and contents through "WP Code".
But, in this case, I will add the custom code through the theme customize panel.
Navigate to the WordPress customize panel by hovering over "Appearance" then "Customize". You can find the "Additional CSS" menu item from the left sidebar menu list.
Here is CSS code for my example. Paste the code into the field and click "Publish" to save the change.
.form-wrapper {
	height: 85vh;
	display: flex;
	align-items: center;
}

.form-innerWrapper {
	margin: 0 auto;
	max-width: 735px;
}

.form-innerWrapper form {
	padding: 2em 0;
}

.form-innerWrapper input {
	margin: 0.5em 0;
}
See the front-end to see the change.
Add more HTML element and more styling
We already overwrite the content with our new HTML element. We can also add more elements like a heading, a background image, or more icons.
For example, we can add a heading that says "Protected Page" and then add a background image. We can also add icons that represent different aspects of the page. Like a lock icon to represent the fact that the page is password protected.
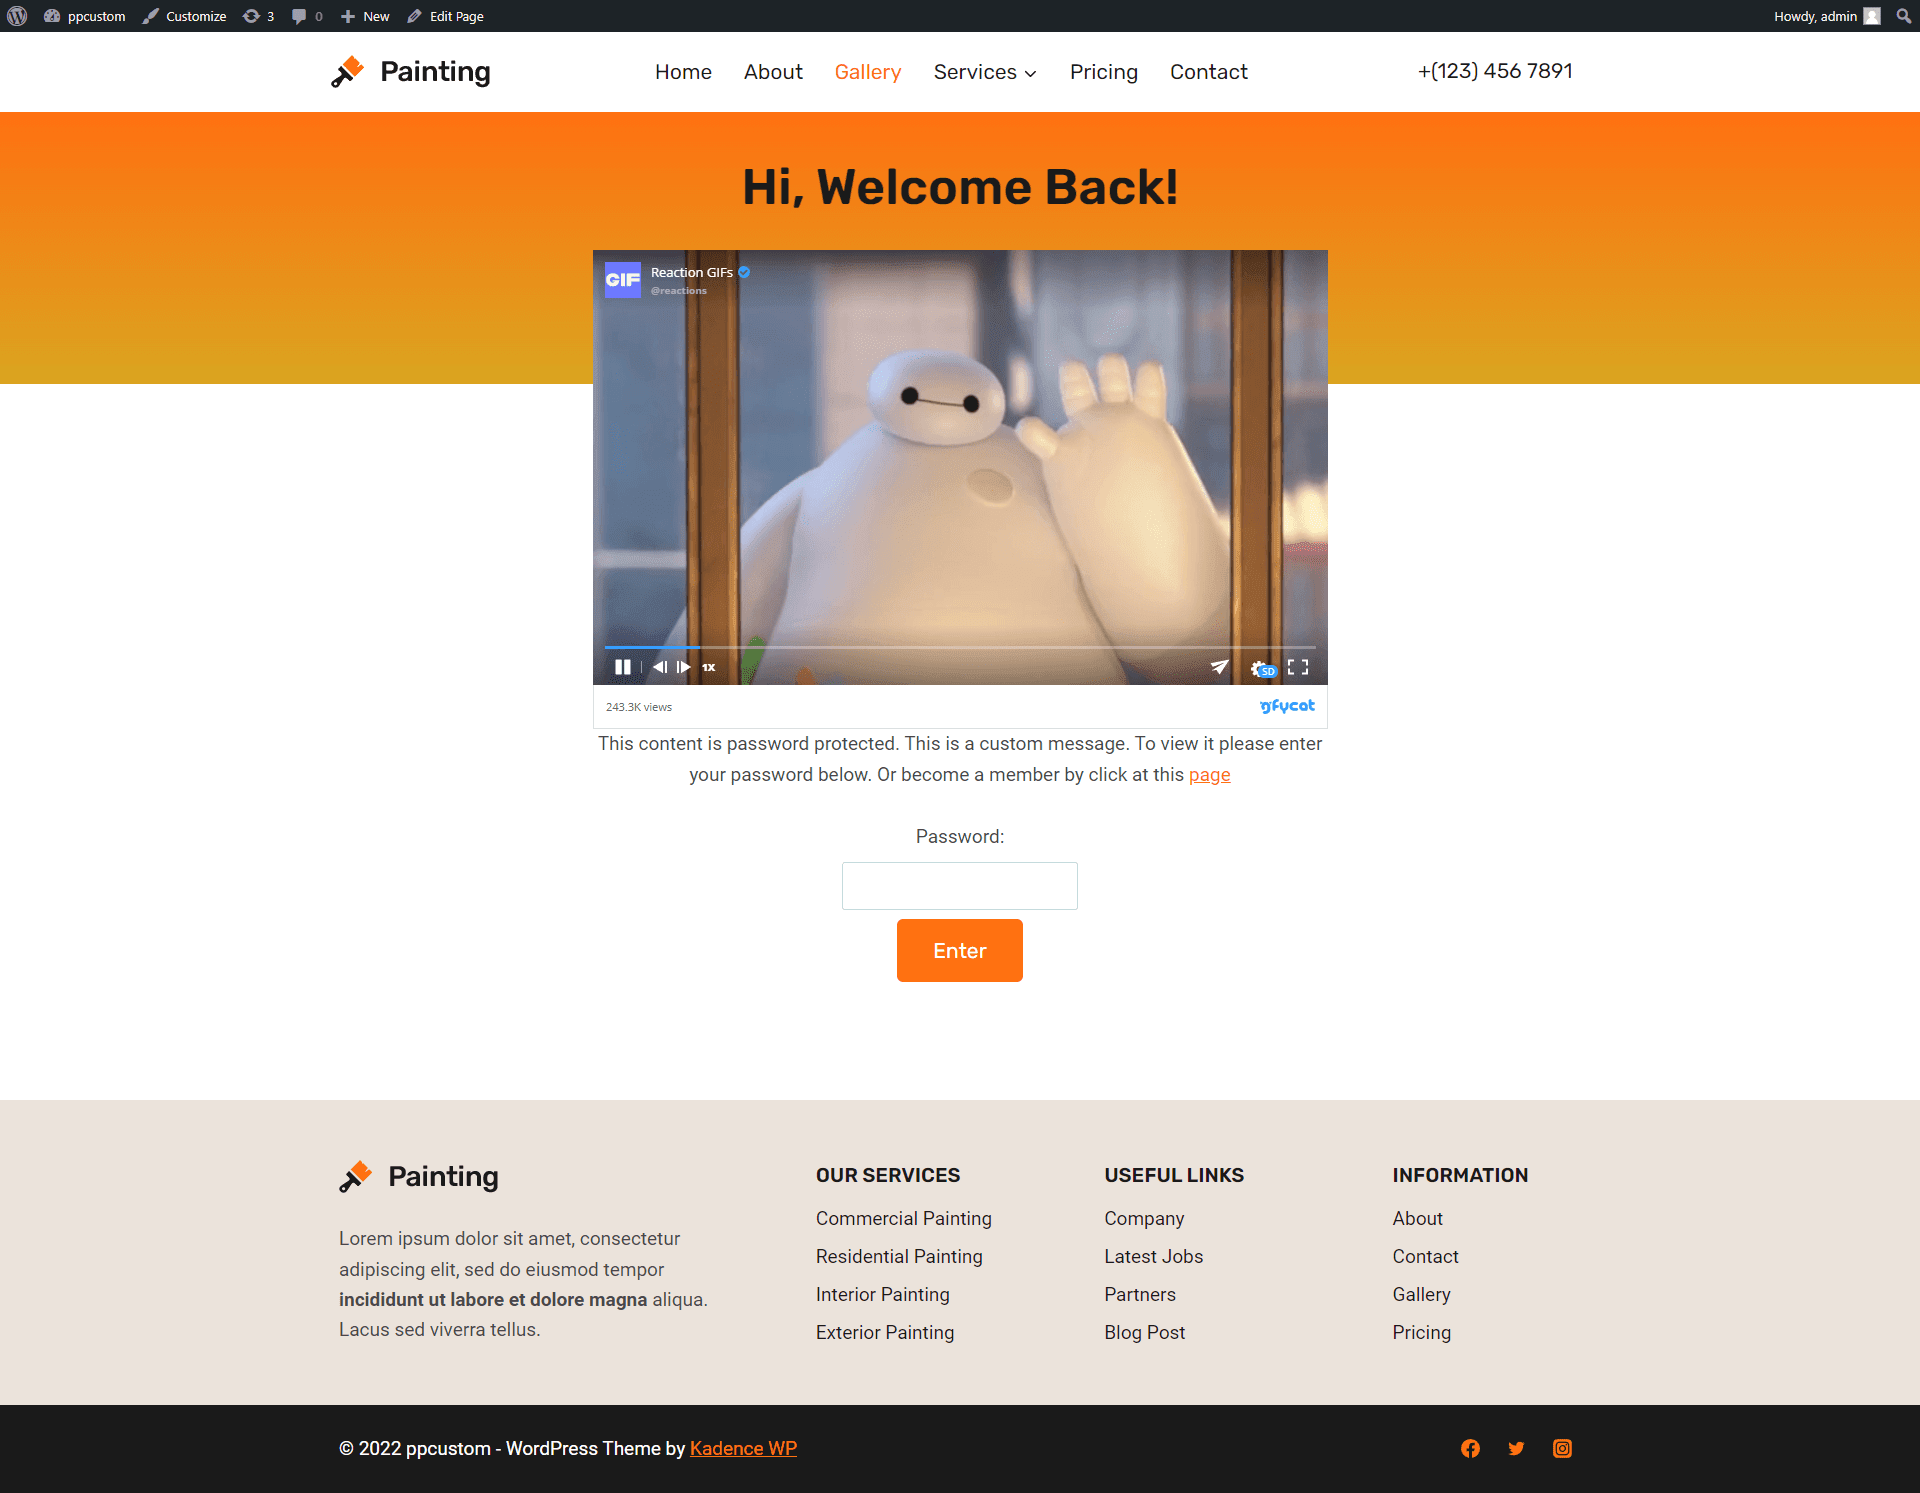
In the following HTML code we will add a heading and an GIF image before the password field.
function my_custom_password_form() {
    global $post;
    $label = 'pwform-' . ( empty( $post->ID ) ? rand() : $post->ID );
    $output = '
    <div class="form-wrapper">
		<div class="form-innerWrapper">
			<form action="' . esc_url( site_url( 'wp-login.php?action=postpass', 'login_post' ) ) . '" class="form-inline post-password-form" method="post">
			<h1>' . __( 'Hi, Welcome back!' ) . '</h1>
			<div style="position:relative; padding-bottom:calc(59.23% + 44px)"><iframe src="https://gfycat.com/ifr/PepperyGrizzledClownanemonefish" frameborder="0" scrolling="no" width="100%" height="100%" style="position:absolute;top:0;left:0;" allowfullscreen></iframe></div>
        	<p>' . __( 'This content is password protected. This is a custom message. To view it please enter your password below. Or become a member by click at this ' ) . '<a href="your-member-link-page">' . __( 'page' ) . '</a></p>
            <label for="' . $label . '">' . __( 'Password:' ) . '</label>
            <input name="post_password" id="' . $label . '" type="password" size="20" class="form-control" />
            <button type="submit" name="Submit" class="button-primary">' . esc_attr_x( 'Enter', 'post password form' ) . '</button>
     	</form>
		</div>
    </div>';
    return $output;
}
add_filter('the_password_form', 'my_custom_password_form', 99);
Then we add more style to create gradient at the top.
.form-wrapper {
	background: rgb(255,112,17);
	background: -moz-linear-gradient(180deg, rgba(255,112,17,1) 0%, rgba(218,165,32,1) 30%, rgba(255,255,255,1) 30%);
	background: -webkit-linear-gradient(180deg, rgba(255,112,17,1) 0%, rgba(218,165,32,1) 30%, rgba(255,255,255,1) 30%);
	background: linear-gradient(180deg, rgba(255,112,17,1) 0%, rgba(218,165,32,1) 30%, rgba(255,255,255,1) 30%);
	filter: progid:DXImageTransform.Microsoft.gradient(startColorstr="#ff7011",endColorstr="#ffffff",GradientType=1);
}

.form-innerWrapper {
	margin: 0 auto;
	max-width: 735px;
}

.form-innerWrapper form {
	padding: 2em 0;
}

.form-innerWrapper input {
	margin: 0.5em 0;
}
In this CSS style example, we add gradient color to the top part.
See the front-end to see the change.
With plugin
If you prefer to use a plugin or don't want to write code yourself. There are many plugins that can customize the password protected page with ease.
If you need more powerful password restriction functionality for your WordPress site, you can use "Passwordprotectwp".
 Becca Kroese
If you are using Elementor as the page builder. You can use the widget by Essential Addon for a more convenient way.


Summary
If you have the time and knowledge, customizing the page using custom code is the most practical option. This is because it will allow you to create a page that is truly unique and tailored to your specific needs.
However, if you are short on time or not confident in your ability to create a custom page, using a third party plugin can be a convenient way to get a professional-looking password-protected page up and running at ease.